Teach, Strengthen & Maintain a 2-on/2-off Contact at Home
Hello and welcome — I’m Emma, trainer and one of the owners at Anglian Dog Works.
In today’s post, I’m breaking down how to teach, strengthen, and maintain a 2-on/2-off contact at home with no special agility equipment. We’ll cover what a 2-on-2-off is, why it matters under Kennel Club rules, and a step-by-step approach for beginner handlers.
Prefer to listen?
Check out the podcast episode on this topic: https://open.spotify.com/episode/5jtMDUp8U4FaSadzZG6Pn2?si=zImkjepgTVquKqwVcaChPQ
When we say 2-on-2-off, we mean the dog pauses at the end of the ramp with their back paws on the ramp and front paws on the ground, holding that position until you give a release cue. While competitions only require at least one paw to touch the coloured contact zone to avoid faults, a reliable 2-on-2-off helps build consistency and safety.
Whether you don’t have access to a dog walk or A-frame, or you simply want to build reliability in a controlled, safe way, this method will help you get there.
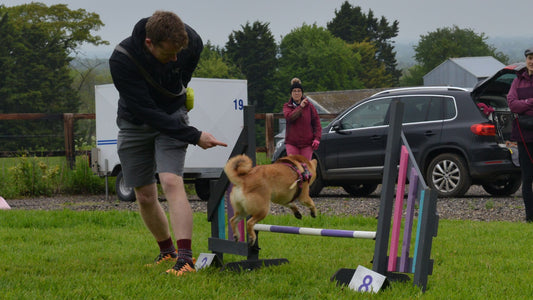
Contact equipment includes A-frames, dog walks, and seesaws, all with coloured zones that dogs must touch. Missing the zone results in five faults under Kennel Club rules. Our goal is simple: teach your dog to reliably hit the zone, avoid faults, and keep your runs clean.
Training your dog to stop instead of launching off reduces the risk of injury and gives you time to catch up on course, allowing for smoother handling. A slightly slower, cleaner run is almost always better than a fast, messy one.
The games in this guide double as maintenance exercises. Since you can’t reward a dog during a competition run, building a reinforcement history at home ensures they associate the position with positive experiences. On the course, their reward becomes the release cue onto the next obstacle.
Short, frequent sessions are key — three rounds of ten repetitions, all under ten minutes, are more effective than one hour-long session per week.
You Will Need a Safe Surface
Choose an area wide enough for your dog to move comfortably. This could be a ramp, stairs, or slope. You can even create an incline using a raised platform like a pivot box or stool.
Puppies shouldn’t practice on an incline due to joint impact. Flat surface training works well for young or older dogs, building confidence safely.
Ensure your ramp or plank is stable, non-slip, and free from wobble or movement.
Teaching the Initial Movement Pattern
-
Stand with your back to the ramp. Imagine the ramp is behind you on your right.
-
Hold a treat between finger and thumb in your right hand.
-
Lean across the ramp towards the far side, tracing an inverted U with your hand. Lure your dog up the ramp, spin them at the apex so they face downhill, then lure them down and reward at the base.
Limit sessions to ten repetitions at a time to avoid mental or physical fatigue.
Early on, reward any contact with the ramp — even if the pause isn’t perfect or the turn is messy. This shaping process gradually builds the behaviour. As repetitions increase, tighten your criteria: reward straighter alignment, higher climbs, or longer pauses at the base.
If your dog overshoots, use a positive interrupter like “nearly” to redirect them. Frequent “nearly” cues signal it’s time to step back and simplify the exercise. Always aim for a positive, confidence-building experience.
Adding Verbal Cues
Once your dog is confident with the initial movement, introduce verbal cues:
-
“Climb” — as they go up (A-frame cue).
-
“Back” — at the top, guiding the turn.
Control their descent by slowing your hand and stopping before they fully dismount. Reward immediately when front paws touch the ground and back paws remain on the ramp. Feed six treats one by one to reinforce the pause.
Once consistent, add the 2-on-2-off verbal cue — for example, “TARGET” — to teach the meaning through association.
I’ve recorded a video demo of the “climb–back–target” pattern — you’ll find it below:
https://youtu.be/sE0TeF7vnoM
Building Duration
Training duration gradually strengthens the hold:
-
Round 1: Move into 2-on-2-off, say “target,” deliver six treats quickly.
-
Round 2: Reduce to three treats, introduce counting: hold 2 → treat, hold 3 → treat, hold 5 → treat.
-
Round 3: Six treats, spaced every five seconds (approx. 30 seconds total).
-
Round 4: Reduce to four treats, spaced every seven or eight seconds.
The final goal: a dog who can hold for 30 seconds with a single treat at the end. While on a course, the pause is shorter, but longer holds at home build reliability. Always release with the same cue (e.g., “OK”) to indicate the behaviour is complete.
Target Training for Distance Control
On a course, you won’t always be able to guide the dog down. Using a target helps your dog stop at a distance.
Steps:
-
Start with a small, flat object (Pringles lid or jar lid).
-
Teach hand touch first.
-
Transfer touch to the object in your hand.
-
Vary position.
-
Place the object on the floor and let your dog target it.
🎓 FREE Preview — Teach Your Dog to Target a Disk Try the free preview lesson (hand touch → disk indication → early article focus): https://angliandogworks.com/products/free-preview-of-article-training
Introduce treat drops onto the target to encourage sustained focus. Combine this with ramp work: hold the target in hand, then vary positions, and finally place on the floor.
Putting It All Together
Place the target at the base of your ramp at home. The full sequence:
“Climb” → “Back” → 2-on-2-off → “Target”
Once confident, vary handler positions — right, left, close, far — and even send the dog ahead. Challenge your dog by walking or running past; they should hold until given the release cue.
Over time, you can fade the physical target and rely solely on the verbal cue. This builds a strong reinforcement history, helping your dog recognise the behaviour in class or on the course.
Maintenance & Daily Practice
Short daily sessions are more effective than one long weekly session. Three rounds of ten repetitions under ten minutes each make more progress than one hour-long session.
If your dog can reliably stop on your ramp at home while targeting an object on the floor, they’re ready to try this in an agility class.
Conclusion
Now you’ve got the plan — could you use a portion of your dog’s meal allowance today to give this a go?
Training 2-on-2-off at home is beginner-friendly, safe, and effective for building course confidence and reducing faults. Daily, short sessions keep your dog engaged and motivated.
Tag @angliandogworks to share your progress and follow us for more agility training tips.
Tags:
Related articles
-
May 11 2023
Ketshker
-
Mar 30 2023